I'm one of them girls who wears lipstick no matter where i am, what day it is or if i'm just running to my local shop. Its safe to say I have a slight addiction. I love everything about them, even right down to the shape and style of the packaging they come in, some may think this is extremely sad, others like me will think this is the norm! My absolute favourite packaging to name just a few are from brands like nars, mac (especially when theres a new campaign!!), the balm, and of course limecrime. I will leave some examples of the packaging i love below and maybe you might understand my adoration a little bit more, no?
Anyway! instead of talking about lipstick packaging which could go on forever, i will get back to what i was originally talking about, dark lipstick!
Priming
To achieve a dark berry lip i firstly started by applying my Smashbox hydrating primer all over my face, paying attention to the dryer parts of my face where my makeup tends to dry out and wrinkle quicker, my forehead, chin and around my eyes and nose. I apply this with the tips of my fingers for a more even finish, by using your fingers it warms the product up slightly and is easier to spread, this also saves product!
Base
Then i go on to applying my concealer around my problem areas and any spots i might have woken up with, i'm probably still in a mood around this point of my makeup because it takes me a while to get over a spot if i have one, not great at dealing with bad skin, clearly. Then i will move on to foundation, using my real techniques buffing brush to blend in mac studio fix fluid in NC15 all over my face. Making sure its blended i will then let that dry and maybe apply another coat depending on how my skin is looking that day. After this i will go back in with my concealer or a lighter foundation and use the famous kimmy k technique, highlighting my tzone - forehead, top of my cupids bow, down the middle of my nose and creating triangles under my eyes down to the side of my nose and over the top of my cheekbone. I will then use my buffing brush to blend this all out.
Eyebrows
While i let my face set i go onto working on my eyebrows, using my sleek eyebrow palette i take the powder and fill in my brows with the brushes provided, occasionally a real techniques brow brush and make little strokes at the end of my brow and the arch area. I dont pay too much attention to the front of my brows until the very end. After i've filled in the end up to the middle of my brows, i go on to use the brown wax and a fine eyebrow brush to darken up the shape of my eyebrows which gives them more definition, i'm all about HD brows. Then i will go back in with a lighter powder, usually omega by mac, mixed with a bit of the dark from the sleek palette and very gently blend this from the front of my brow to the middle of my brow. This creates a slight ombre effect and makes them look alot more realistic and HD but not extremely harsh. Eventually when my brows are exactly how i want them, i touch them up by using concealer on a small lip brush around my eyebrow to sharpen it up and apply my nars highlighter on my brow bone.
Eyes
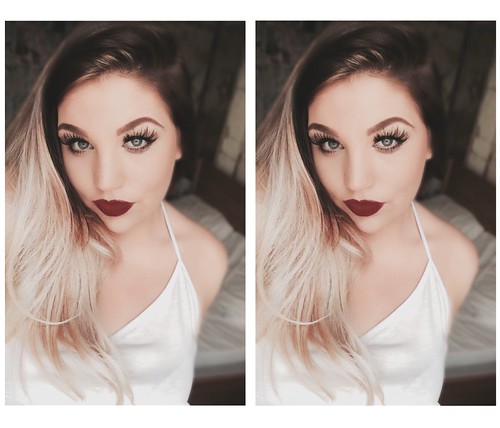
To create the look in the image above i applied my urban decay primer potion to the lids of my eyes and then applied omega eyeshadow on my lid and blended it out to my brow bone. I didn't want my eyes to be too dark along with my lipstick as this was a look i wore in the day. If i was going out in the evening i would of added more eyeshadow and liner to my waterline. I then used my benefit "they're real! push up" liner pen on my lids and flicked it out creating a wing effect, this elongates your eyes and helps your mascara stand out and hides your false eyelash band. I use benefits "they're real" mascara along with loreal telescopic to comb my lashes through, after i've applied mascara i then grab my tweezers and apply my mink lashes. (You can wear these over 20 times, love these!) I apply a tiny amount of mascara to help blend my lashes in with them also.
Contouring
To contour i use benefits Hoola bronzer on my real techniques contour brush and apply it from the top of my ear and over my cheekbone but stopping when i get it inline with my eye, if you pull it down anymore towards your mouth you can end up looking quite masculine looking. I then blend this out with my blush brush from real techniques, adding a tiny bit of bronzer to the apples of my cheek. For my forehead, i applied hoola, again with my contour brush to add definition and shape to my face. To shape my nose i use a detailer brush by Real Techniques and apply a small amount of bronzer to the sides of my nose to create the illusion of a smaller nose, i don't have a problem with the shape of my nose but i feel it adds to the whole contoured defined look on my face.
Lips
When putting product on my lips i like to add carmex while i'm priming, by the time it comes to add my lipstick, my lips are smooth and are rid of any dry skin. To create a dark lip i first lined my lips with macs nightmoth lipliner, and then went on to apply nars 413 warm rose brown to my lips, i used a lip brush to apply it with as i feel it goes on with a nicer finish. Once i've applied the lipstick i then go on to applying more lipliner to the corners of my lips and then blend in towards the middle of my lips.
Touch ups
Once ive finished my makeup, i will blot my lips with tissue paper to get any extra lipstick off, and go over my face with macs translucent powder to set everything. Then with macs finishing spray i apply to squirts from a distance and this keeps my makeup in places all day.
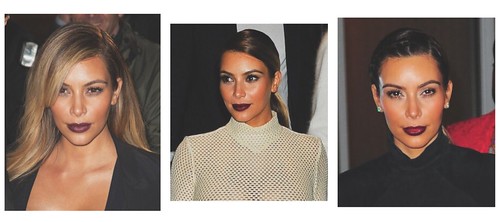
Inspiration
Packaging I love

Products I used
Smashbox Primer: HERE
Mac studio fix fluid: HERE
Rimmel Concealer: HERE
Real Techniques Buffing Brush: HERE
Sleek Eyebrow Palette: HERE
Nars Highlighter: HERE
Urban Decay Primer Potion: HERE
Omega Eyeshadow by Mac: HERE
Benefit Mascara: HERE
Benefit Eyeliner: HERE
Mink Eyelashes: HERE
Benefit Hoola Bronzer: HERE
Real Techniques Contour Brush: HERE
Nars Lipstick: HERE
Mac Nightmoth Lipliner: HERE
Mac Translucent Powder: HERE
Mac Setting Spray: HERE
So this post turned into a bit of a daily makeup routine as well as how I did my dark lips! I hope you learn a few tips from this and if you have any tips on any of the products ive used comment and let me know. Id love to hear what you think!
Follow me here on bloglovin
To see the latest from me, you can find me on twitter
Jayne
Your make up is like perfect, I can't even. I love a good dark lip, and this is such an informative post about how to build up make up so they're the focus.
ReplyDeleteS xo.
blinkeredbarbielife.blogspot.com
Ah thankyou very much! glad you liked it :)
Deletexo
Love this post - you look fab and it's great you took the time to go into detail! xx
ReplyDeleteThankyou very much lovely
Deletexo
Your makeup is like perfection!
ReplyDelete♥ http://shopaholicoverhere.blogspot.nl/
thanks sweet! xo
DeleteYour eyebrows are amazing!! x
ReplyDeletePillarbox Post
thankyou lovely!
Deletexo
Jayne you are a gorgeous girl and your make up is perfection! You must have put a lot of work into this blog, it is amazing! I absolutely love it and I am proud to call you my sister, even more so after seeing this blog! It is fantastic. Somebody needs to employ you! x
ReplyDeleteawh! thankyou jen! thats so nice of you, love you my big sis! xxxx
Delete